A 2x4 Garage Shelf That Won't Sag (Unlike the Last One)
A while back, about nine o’clock at night, Linda and I heard a crash from the garage. It sounded like somebody dropped a piano.
It was the shelf. A metal-and-particleboard unit I bought at a big-box store years ago. It held paint cans, a few boxes of tile, and the Christmas decorations. The middle shelf had sagged a little more every year until one night it gave up. It took the shelf below with it.
The box it came in said “HEAVY DUTY” in letters three inches tall. I’d hate to see what light duty looks like.
Buck heard the crash, walked to the garage door, looked at the mess, and went back to bed. I wish I’d done the same. Instead I spent an hour picking up tinsel.
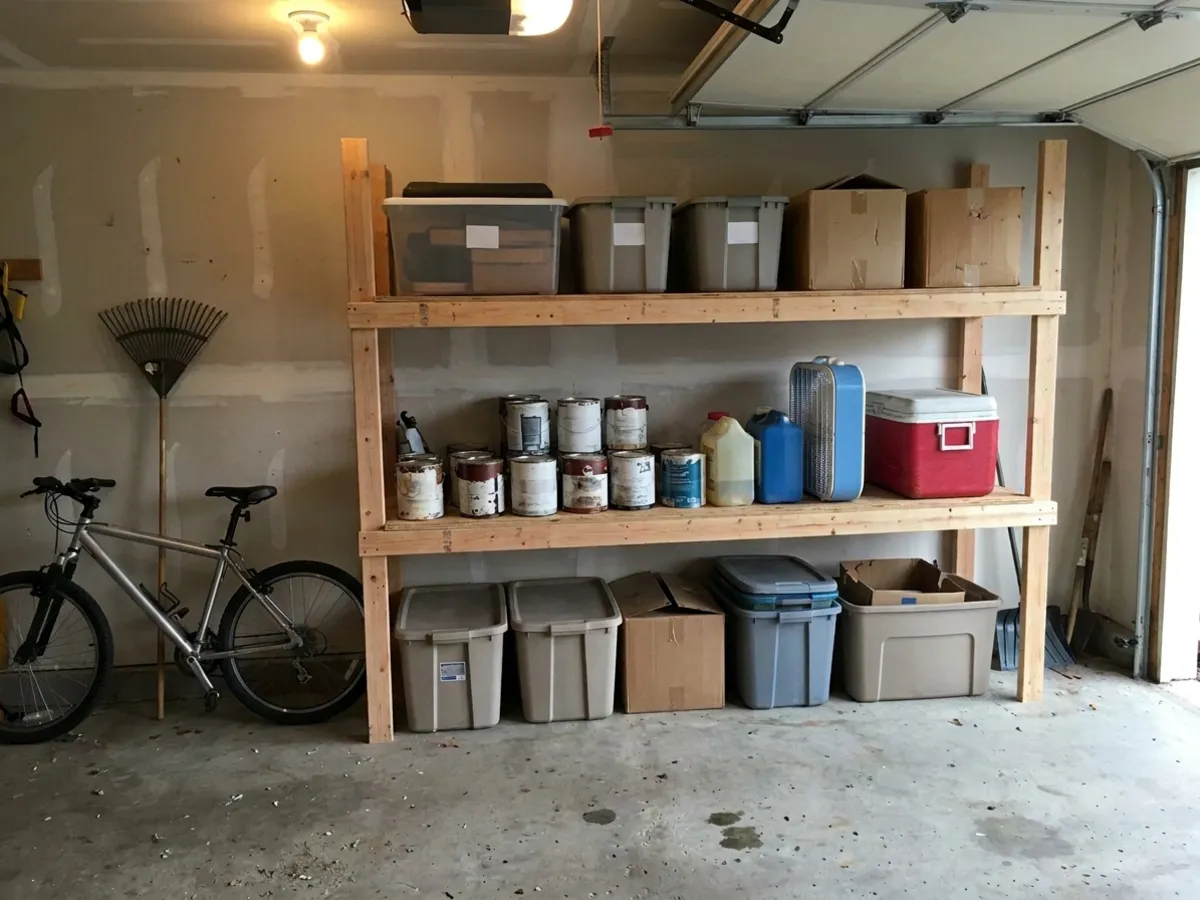
The next weekend I built this. It has held everything I have put on it since.
Why this one won’t sag
Shelves sag for two reasons. The shelf material is too weak, or the supports are too far apart. This design fixes both.
The 2x4s stand on edge. A 2x4 is about twelve times stiffer standing on its narrow edge than lying flat. That’s not a typo. Stiffness goes up fast with depth. So every rail in this shelf stands up tall.
The supports are close together. There’s a crosspiece every 24 inches under every shelf. The plywood never has to span more than two feet.
The plywood is real plywood. Three-quarter-inch plywood, not particleboard. Particleboard sags under steady weight and falls apart when it gets damp, and garages get damp.
The finished size
- 8 feet long (96")
- About 27" deep (24" shelves plus the uprights)
- 6 feet tall (72")
- Four shelves with about 16 to 18 inches of clear space between them
Adjust the shelf heights to fit what you store. Measure your totes first. Measure twice, buy once.
Materials
- 18 eight-foot 2x4s (buy two extra; you’ll find a crooked one)
- 2 sheets of ¾" plywood, 4x8
- 3" structural or construction screws, rated for structural use (about 150)
- 1⅝" wood screws for the shelf decks (about 150)
One warning at the lumber yard. Many stores sell “precut studs” that are 92⅝" long, not a full 8 feet. You need full 96" boards for the rails. Check the tag.
And don’t use drywall screws for this. They’re brittle and can snap under a sideways load. Use screws made for framing.
Cut list
| Part | Qty | Material | Length |
|---|---|---|---|
| Uprights | 6 | 2x4 | 72" |
| Rails (front and back) | 8 | 2x4 | 96" (full length) |
| Crosspieces | 20 | 2x4 | 21" |
| Shelf decks | 4 | ¾" plywood | 24" x 96" (rip each sheet in half lengthwise) |
Cut the six uprights from six boards. The 24" leftovers each give you one 21" crosspiece. Cut the other 14 crosspieces from four more boards.
If you don’t have a way to rip plywood straight, most lumber yards and home centers will make the cut for you. Ask nicely.
Build the four shelf frames
Each shelf is a simple rectangle, like a little floor frame.
- Lay two rails on edge, parallel, on a flat floor.
- Set five crosspieces between them: one at each end and one every 24 inches (at 24", 48", and 72").
- Drive two 3" screws through the rail into the end of each crosspiece. Pre-drill near the ends to keep from splitting.
- Measure corner to corner both ways. When the numbers match, the frame is square.
The frame should measure 24" by 96". Build all four.
Stand it up
This is a two-person job. Grab a helper.
- Mark the uprights. Mark the bottom of each frame at 4", 26", 48", and 68½" from the floor end. The top frame ends up flush with the top of the uprights.
- Lay the three back uprights on the floor, one at each end and one in the middle. Set the frames on edge against them at your marks, and fasten each rail to each upright with three 3" screws.
- With a helper, stand it up and attach the three front uprights the same way.
- Check that it’s plumb and square before you add the decks.
Want it even stronger? Screw a short 2x4 block to each upright right under each rail. Now the rails sit on something instead of hanging only on screws. It costs one or two more boards and fifteen minutes.
Add the decks
Lay a plywood deck on each frame and screw it down with 1⅝" screws about every 10 inches, into the rails and crosspieces. The decks lock the whole thing together and keep it from racking side to side.
Anchor it to the wall
Don’t skip this. A loaded shelf that tips over can hurt somebody.
Find the wall studs and screw the back uprights or the top rail to them. If the shelf doesn’t sit tight against the wall, use blocking or metal brackets to close the gap.
On a concrete floor, slip a small plastic shim under each upright. Bare wood sitting on concrete wicks up moisture.
Safety
Wear safety glasses and hearing protection when cutting. Keep heavy stuff, like paint and tile, on the lowest shelves. Light stuff, like Christmas tinsel, goes up top.
When I finished, I leaned my whole weight on the middle of the bottom shelf, just to see. It didn’t budge. I can’t say that about the last one.
Keep your tools sharp, — Dale
Dale’s notes
Get Dale's shop notes by email
Short notes from the shop: projects, fixes, and calm ways to be ready. Plain talk, no spam, and you can unsubscribe anytime.
No spam. Unsubscribe anytime. See the Privacy Policy.