Lily's Step Stool: A Sturdy First Project with a Cut List
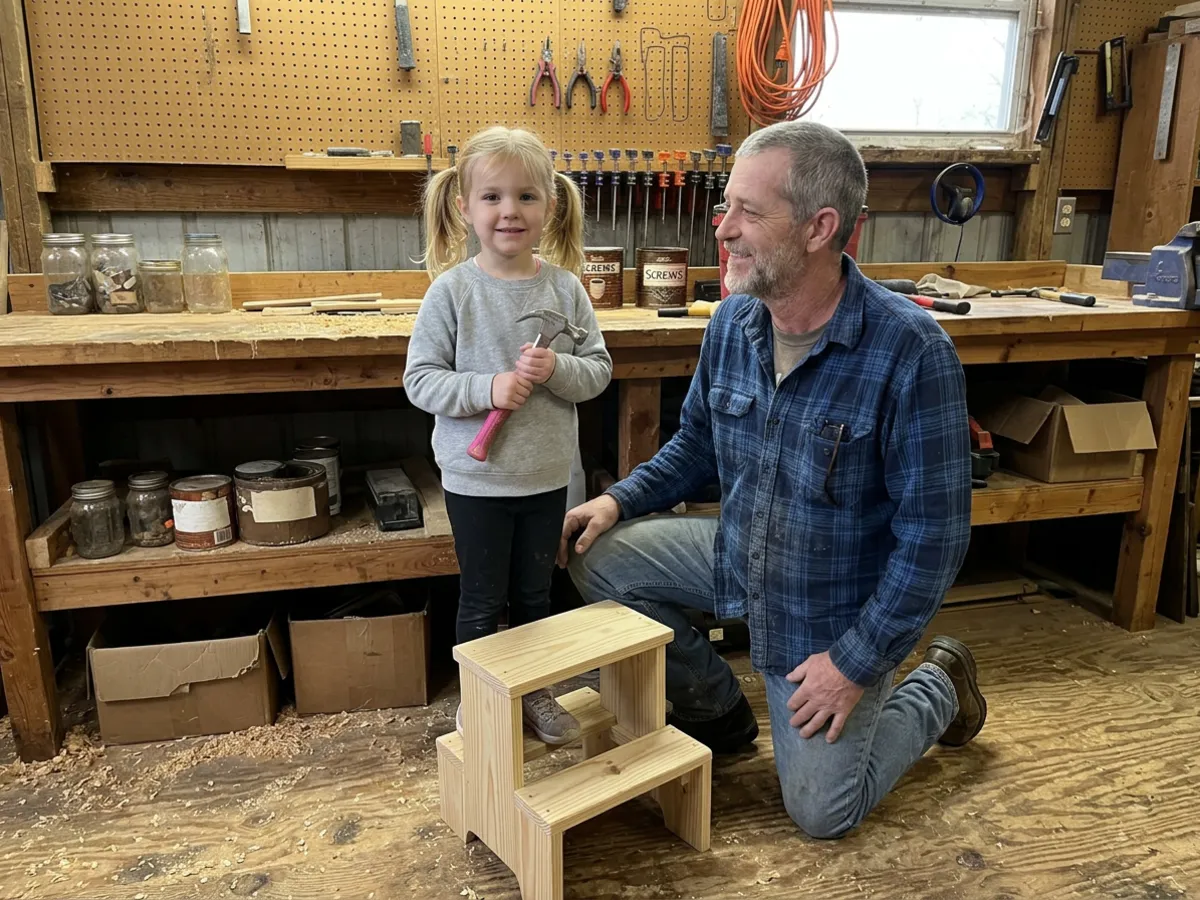
My granddaughter Lily is five. She has her own little hammer with a pink handle, and she takes it very seriously.
A while back, Katie mentioned that Lily couldn’t reach the bathroom sink at their place. She’d been dragging a kitchen chair in there. Katie is a nurse, so she said this the way nurses do, calmly, while picturing every possible way it could go wrong.
So Lily and I built a step stool.
This is a good first project. Straight cuts, simple joints, one Saturday. If you’ve never built anything, start here.
What you’ll need
Lumber
- One 1x10 pine board, 4 feet long (actual size is about ¾" x 9¼")
- One 1x3 pine board, 3 feet long (actual size is about ¾" x 2½")
Pick boards that are flat and straight, with no big knots or cracks. Close one eye and sight down the edge. If it curves, leave it on the rack.
Hardware and supplies
- 1⅝" wood screws (about 20)
- Wood glue
- Sandpaper, 120 and 180 grit
- A clear water-based finish, or paint
Tools
- Tape measure, pencil, and a square
- A saw (a circular saw, a miter saw, or a good handsaw all work)
- A jigsaw or coping saw for the arch in the legs
- A drill with a countersink bit
- Clamps (two will do)
- Safety glasses and hearing protection
The cut list
| Part | Qty | Board | Length |
|---|---|---|---|
| Top | 1 | 1x10 | 16" |
| Legs | 2 | 1x10 | 8¼" |
| Aprons | 2 | 1x3 | 11½" |
That makes a stool 9 inches tall, 16 inches wide, and 9¼ inches deep. Good height for a sink, and wide enough that a kid can’t step off the end by accident.
Square your cuts. Mark with the square, cut on the waste side of the line, and check that both legs come out exactly the same length. If they’re off, the stool will rock, and you’ll hear about it.
Cut the arch in the legs
The arch makes two “feet” on each leg. A stool on two feet sits steady on a floor that isn’t perfectly flat. A solid leg will rock.
On the bottom edge of each leg, mark a point 2½" in from each side. Then mark 2" up at the center. Connect those three points with a smooth curve. A thin strip of wood bent between two nails makes a nice, even arc to trace.
Cut it with a jigsaw or coping saw, staying just outside the line. Then sand to the line. Do one leg, then trace it onto the other so they match.
Assembly
Dry-fit everything first. That means put it together with clamps, no glue, and make sure it all lines up.
1. Attach the aprons to the legs. Stand the legs up 11½" apart. The aprons go between them, one along the front edge and one along the back, flush with the top of the legs. Glue the ends of the aprons, clamp them in place, and drive two screws through each leg into the end of each apron.
2. Pre-drill everything. Pine splits easily near the ends. Drill a pilot hole for every screw, and use a countersink bit so the screw heads sit just below the surface.
3. Check for square. Measure corner to corner both ways across the base. If the two numbers match, it’s square. If not, push gently on the long corner until they do.
4. Attach the top. Center the top over the base, so it overhangs about 1½" past each leg. Glue the top edges of the legs and aprons. Then screw down through the top: three screws into each leg and two into each apron.
Wipe off any glue that squeezes out with a damp rag before it dries. Dried glue won’t take a finish.
Sand and finish
This is where your helper comes in. Lily sanded every edge on that stool while I held it steady. She declared the corners “too pointy,” and she was right.
Round over every edge and corner with 120-grit sandpaper, then smooth everything with 180. Little hands and little shins will find any sharp spot you miss.
Fill the screw holes with wood filler if you like, and sand it flush.
For a finish, I used two coats of a clear water-based finish. It dries fast, doesn’t smell much, and holds up to wet hands at a sink. Paint works fine too. Let it cure fully before it goes into service. Read the can, and give it the full time.
The test
Before any grandkid stands on something I built, I stand on it first. I’m a good bit heavier than Lily. It didn’t creak, didn’t rock, and didn’t move.
Lily stood on it three times, very seriously, with her hammer in hand. Then she said, “Good job, Grandpa,” and walked off to find Buck.
It’s the best review I’ve ever gotten.
A few notes
- Keep it simple. This is a stool for a little one at a sink, not a ladder for grown-ups to reach the top shelf.
- If you’ll use it on a slick floor, stick small rubber pads under each foot.
- Write the date and the kid’s name on the bottom. Someday it’ll matter more than you think.
Keep your tools sharp, — Dale
Dale’s notes
Get Dale's shop notes by email
Short notes from the shop: projects, fixes, and calm ways to be ready. Plain talk, no spam, and you can unsubscribe anytime.
No spam. Unsubscribe anytime. See the Privacy Policy.