How I Taught My Son to Sharpen a Chisel
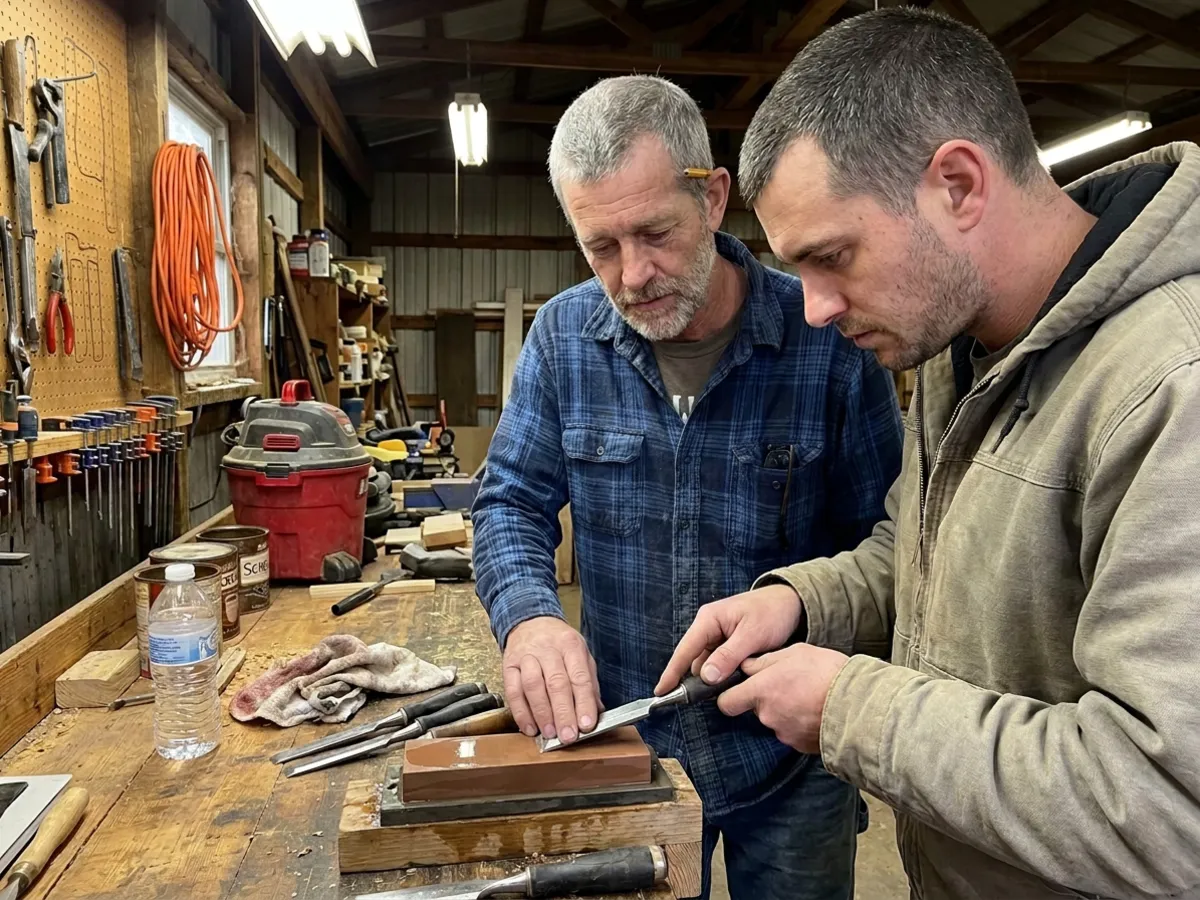
My son Matt works in HVAC. He can braze a copper line, wire a thermostat, and find a gas leak faster than I can find my reading glasses. He’s handy.
But a few Sundays ago he came out to the shop holding a chisel like it had personally insulted him.
“This thing won’t cut butter,” he said.
He was right. The edge was rounded over, nicked, and a little rusty. He’d been using it to scrape paint and pry open cans. I didn’t say anything about that. I just pulled up a second stool.
Here’s what I showed him. It’s the same thing I’d show you.
Why bother
A sharp chisel is a safe chisel. That sounds backward, but it’s true. A dull chisel needs a lot of force to push. Force is what makes it slip. When a sharp chisel slips, it’s usually because you got careless. When a dull one slips, it’s because you were doing everything right and it still fought you.
A sharp chisel also does better work. Clean cuts, crisp corners, no crushed fibers.
What you need
You need something flat and abrasive, in a few grits from coarse to fine. There are a lot of ways to get there:
- Water stones. Fast cutting. Some need soaking before use, and they need flattening now and then.
- Oil stones. Slower, but they last forever. Use a little honing oil.
- Diamond plates. Stay flat, cut fast, and work with a splash of water.
- Sandpaper on glass. The cheapest way to start. Wet-or-dry paper on a flat piece of thick glass works fine.
Whatever you use, you want at least three steps: something coarse (around 300 to 400) for shaping and fixing nicks, something medium (around 1000) for sharpening, and something fine (4000 and up) for polishing the edge.
A honing guide is a little clamp on a wheel that holds the chisel at a steady angle. It’s not cheating. It’s how most folks learn. Matt used one. So did I, for a good while.
Step 1: Flatten the back
This is the step everybody wants to skip. Don’t.
The cutting edge is where two surfaces meet: the back and the bevel. If the back isn’t flat and smooth, the edge can never be truly sharp. It doesn’t matter how good your bevel is.
You don’t need to flatten the whole back. Just the last inch or so near the edge.
Lay the chisel flat on your coarse stone, back side down. Press down near the edge with your fingers and rub it back and forth. Look at the scratch pattern. When the scratches run evenly all the way across, right up to the edge, move to the next grit. Repeat on each stone until that last inch shines.
Matt’s took about twenty minutes. He asked twice if we were done. We weren’t.
The good news: you only do this once. After that, a few strokes on the finest stone keeps it right.
Step 2: Sharpen the bevel
Most bench chisels are ground with a bevel of about 25 degrees. Set your honing guide to that angle.
Start on your coarse stone if the edge has nicks. Otherwise start on the medium. Rub the bevel back and forth with steady, even pressure. Keep the angle steady. Rocking the chisel rounds the edge, and a round edge is a dull edge.
Step 3: Feel for the burr
Here’s how you know when to stop.
As you grind the bevel, a tiny lip of metal curls over onto the back of the edge. That’s the burr. Carefully drag your fingertip off the back of the chisel, away from the edge, never along it. If you feel a slight catch all the way across, you’ve sharpened all the way to the edge. Move to the next grit.
If you only feel it in one spot, keep going. You’re not done.
Step 4: Hone a microbevel (optional)
On your finest stone, raise the angle a few degrees, to around 30. Take just a few light strokes. This puts a tiny, steeper bevel right at the very tip.
It makes the edge a little tougher, and it makes touch-ups fast. Next time, you just hone the microbevel. You don’t have to grind the whole bevel again.
Step 5: Take off the burr
Flip the chisel onto its flat back, on your finest stone. Give it a few light strokes. That knocks the burr off. Some folks finish with a few strokes on a leather strop loaded with polishing compound. It’s a nice final touch.
Step 6: Test it
Don’t test it on your arm hair. I’ve seen grown men do that. Some of them have the scars.
Instead, pare a thin slice off the end grain of a piece of pine. End grain is the hardest test there is. A dull chisel crushes it. A sharp one leaves a clean, shiny surface.
Matt took one slice. Then he took about six more. He looked at the shavings and grinned. “Well, heck,” he said.
Keeping it sharp
- Hone a few strokes on your finest stone whenever the chisel stops cutting cleanly. Don’t wait until it’s dull.
- If you use a bench grinder, go slow and keep the steel cool. If the edge turns blue, it got too hot and lost its hardness. You’ll have to grind past it.
- Store chisels so the edges don’t knock into other tools. A canvas roll or a rack works.
- Never use a good chisel to scrape paint or open cans. Keep a junk one for that.
Matt took his chisel home that night. A week later he sent me a picture of a hinge mortise he cut in his back door. Clean as a whistle.
He also bought a junk chisel for opening paint cans. I’ve never been prouder.
Keep your tools sharp, — Dale
Dale’s notes
Get Dale's shop notes by email
Short notes from the shop: projects, fixes, and calm ways to be ready. Plain talk, no spam, and you can unsubscribe anytime.
No spam. Unsubscribe anytime. See the Privacy Policy.